AWS Network Load Balancing & Failover: Install the SafeKit farm.safe Module
High Availability Quick Installation Guide for AWS
This guide explains how to set up a farm cluster for AWS using SafeKit, ensuring network load balancing and automatic failover.
For help, you can use SafeKit AI 🤖.
1. Overview
- Architecture: Implements a scalable, multi-node load-balanced farm with a virtual IP address.
- High Availability: Features automatic health monitoring and seamless failover to ensure service continuity.
2. Installation
- Software: Install the SafeKit engine on all servers.
- Module: Download the pre-configured
farm.safeapplication module.
3. Configuration
- Web Console: Configure the AWS farm cluster.
- Monitoring: Start monitoring and protecting the AWS application.
SafeKit High Availability Limitations
| Limit / Requirement | Reason & Impact | Recommended Alternative |
|---|---|---|
| Replication size: A few TBs | Resynchronization time after failure (step 3): • 1 Gb/s network ≈ 3 hours / TB • 10 Gb/s network ≈ 1 hour / TB (depending on disk write performances) | • Use external shared storage (more expensive, more complex). |
| File count: < 1,000,000 files | • Resynchronization time performance after a failure (step 3). • Time needed to compare each file between both nodes. | • Put the many files to replicate in a virtual hard disk / virtual machine. • Only the files representing the virtual hard disk / virtual machine will be replicated and resynchronized in this case. |
| Failover capacity: ≤ 32 VMs | • Each VM runs in an independent mirror module. • Maximum of 32 mirror modules running on the same cluster. | • Use an external shared storage and another VM clustering solution (more expensive, more complex). |
| Network architecture: LAN/VLAN network between remote sites | • Automatic failover of the virtual IP address with 2 nodes in the same subnet. • Good bandwidth for resynchronization (step 3). • Low latency for synchronous replication: typically < 5 ms RTT; higher values should be validated against the application’s write rate. | • If the two nodes are in different subnets (common in the cloud), use other rerouting options: a load balancer, cloud provider CLIs, BGP, or DNS redirection. • Use backup solutions with asynchronous replication for high latency network. |
Overview of the SafeKit / AWS solution
The solution is described here: 💡SafeKit: Amazon AWS Load Balancing & Application High Availability Farm Cluster.
Installation of the SafeKit / AWS solution on Windows and Linux (farm.safe)
Configuration of the Amazon AWS load balancer
The load balancer must be configured with a virtual IP address.
And the load balancer must be configured to periodically send health packets to nodes.
For that, SafeKit provides a health check which runs inside the nodes and which
- returns OK when the farm module state is UP (green)
- returns NOT FOUND in all other states
You must configure the Amazon AWS load balancer with:
- HTTP protocol
- port 9010, the SafeKit web server port
- URL /var/modules/farm/ready.txt (if farm is the module name that you will deploy later)
For more information, see the configuration of the Amazon AWS load balancer.
⚠️ Do not configure a virtual IP address and load balancing rules at step 4 in the step by step configuration below. The virtual IP address and load balancing rules are already set in the Amazon AWS load balancer. Setting a virtual IP and load balancing rules at step 4 is useful for on-premise configuration only.
Configuration of the Amazon AWS network security
The network security must be configured to enable communications for the following protocols and ports:
- UDP - 4800 for the safeadmin service (between SafeKit nodes)
- UDP - 4803 for the heartbeat inside the farm module (between SafeKit nodes)
- TCP – 9010 for the load-balancer health check and for the SafeKit web console running in the http mode
- TCP – 9001 to configure the https mode for the console
- TCP – 9453 for the SafeKit web console running in https mode
Package installation on Windows
- Download and install the free version of SafeKit on 2 Windows nodes.
Note: the free version includes all SafeKit features. At the end of the trial, you can activate permanent license keys without uninstalling the package. - Upon completing the package installation, select Set console credentials and firewall rules now and configure a password for the admin user of the SafeKit console.
Set the same password on all nodes. - Exclude from antivirus scans C:/safekit/ (the default installation directory) and all replicated folders that you are going to define.
Antiviruses may face detection challenges with SafeKit due to its close integration with the OS, virtual IP mechanisms, real-time replication and restart of critical services.
Package installation on Linux
- Install the free version of SafeKit on 2 Linux nodes. Note: the free trial includes all SafeKit features. At the end of the trial, you can activate permanent license keys without uninstalling the package.
- After the download of safekit_xx.bin package, execute it to extract the rpm and the safekitinstall script and then execute the safekitinstall script
- Answer yes to firewall automatic configuration
- Set the password for the web console and the default user admin. Set the same password on all nodes.
Note: the generic farm.safe module that you are going to configure is delivered inside the package.
Step by step configuration of the SafeKit / AWS solution
Prerequisites
- Install on at least 2 nodes.
- For virtual IP load balancing, all nodes must be on the same LAN or extended LAN (layer 2). Routed layer 3 networks require 🛠️ cloud load balancers.
1. Launch the SafeKit console
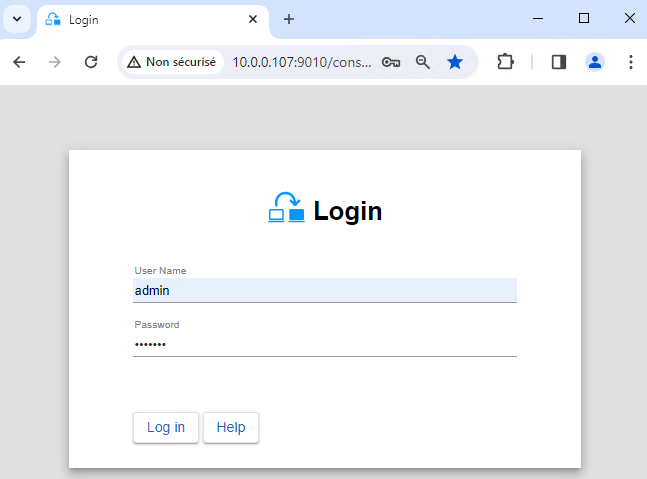
- On one cluster node, open a browser and connect to
http://localhost:9010. - Sign in with the user name
adminand the password set during installation.
You can also open the console from a workstation outside the cluster.
⚠️ Use a single browser to configure both nodes with SafeKit.
ℹ️ To secure the web console, see 🛠️ 11. Securing the SafeKit web service in the User’s Guide.
2. Configure node addresses
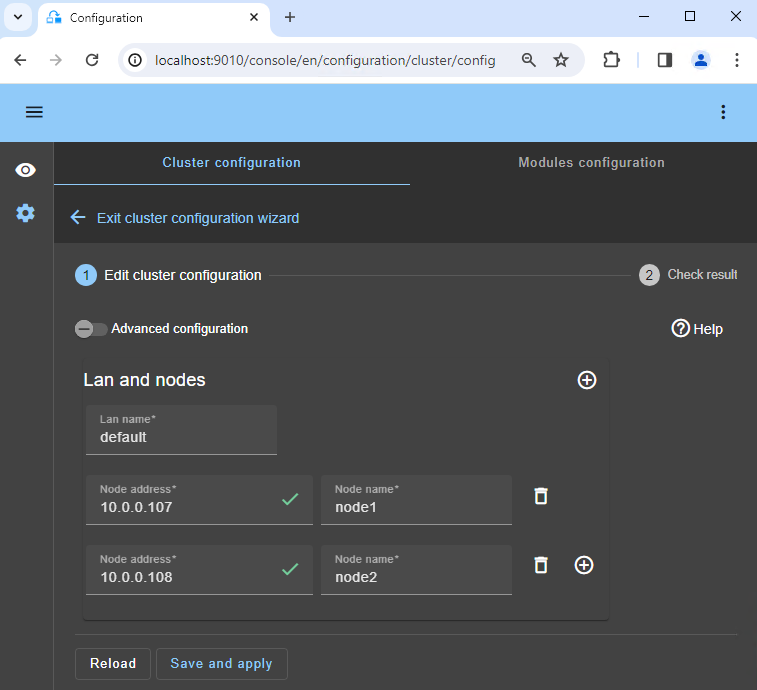
- Enter the IP address of each node. Press the Tab key to check the connection and fill in the node names.
- If
node1ornode2is red, check that the browser can reach both nodes. Check the firewall on each node. See 🛠️ troubleshooting. - Click
Save and applyto save the configuration. - Check that both nodes display ✅
Success. - If a node displays ❌
Failure, expand its ▼ panel and read the messages. Use the SafeKit AI 🤖 if you need help.
ℹ️ To add a second heartbeat network and a dedicated replication network, click the first ➕ button in LAN and nodes.
ℹ️ Click Advanced configuration to view the file cluster.xml. The console fills in this file and deploys it on both nodes.
3. Select a module
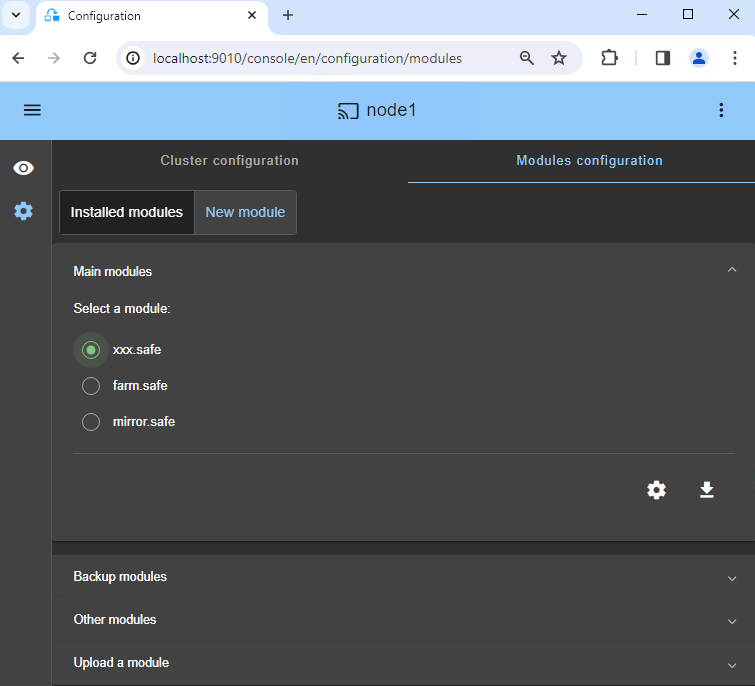
- In
New module, select the modulefarm.safe.
ℹ️ In the blue banner, 🛜 node1 is the node connected to the console. It forwards requests to node2 when needed.
ℹ️ If you added a module file xxx.safe during installation, the console looks for it in the directory Application_Modules/generic/ on node1.
4. Configure the module
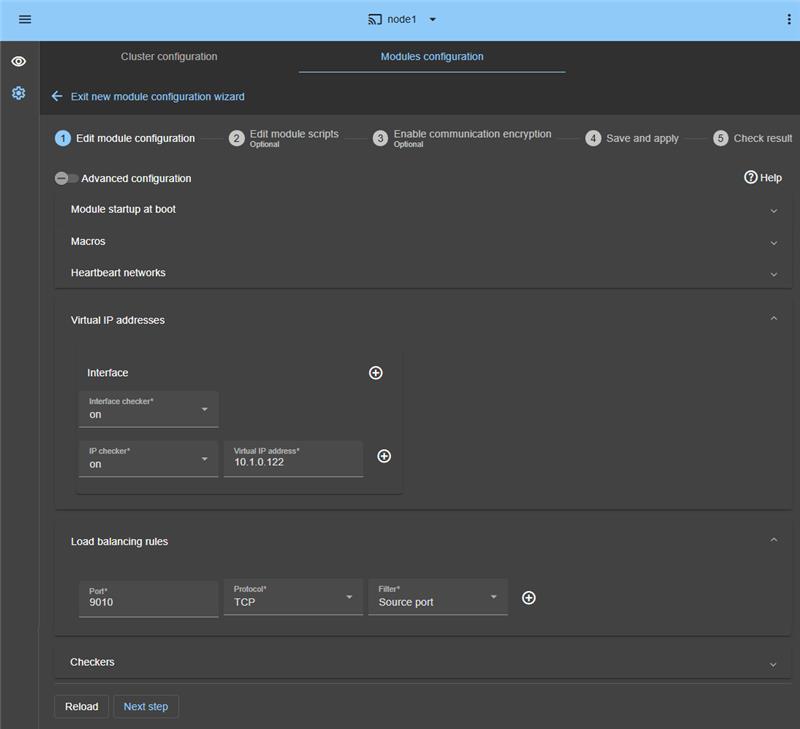
- In
Module startup at boot, set the module to start automatically at boot, without delay. - In
Macros/SERVICES, list the application services in startup order. Separate the names with commas. - In
Heartbeat networks, keep one heartbeat network unless you added a LAN in step 2. - In
Virtual IP addresses, enter a virtual IP address in the same subnet as both nodes. - Configure application clients to use this virtual IP address or its DNS name.
- In
Load balancing rules, enter the service port to balance, for example TCP port 9010. - In
Load balancing rules, selectSource addressorSource port:Source address: all TCP connections from the same client go to the same node in the farm. This preserves the client’s session context on that node.Source port: TCP connections from the same client can go to different nodes in the farm. Session context is not shared between nodes.
- In
Checkers, add checks if needed: process monitoring, custom checks, TCP, ping, or split-brain checks. - A process listed in
Monitored processes/servicesis monitored and restarted if it fails. An incorrect process name causes the module to stop immediately after startup.
ℹ️ Click Advanced configuration to view the file userconfig.xml. The console fills in this file and deploys it on both nodes with the restart scripts.
ℹ️ In a cloud deployment, the 🛠️ cloud load balancer manages the virtual IP address and load balancing rules. Do not configure them in SafeKit.
ℹ️ When you apply the configuration, SafeKit sets the Windows service startup type to Manual. Services start with the module, not at system boot. SafeKit also prevents these services from starting at system boot on Linux.
5. Edit scripts (optional)
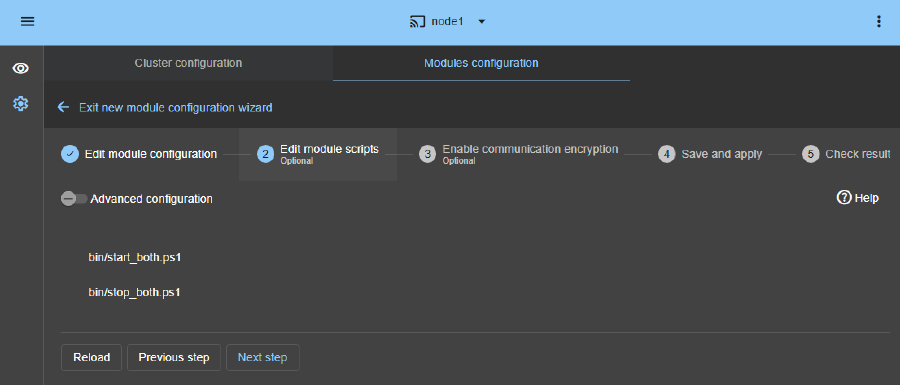
- In most cases, you can skip this step. The scripts are already configured to restart the services listed in the previous step.
- Click
Next stepif no changes are needed. - The script
start_both.ps1starts services in the order of the listSERVICES. - The script
stop_both.ps1stops services in reverse order. - The script
start_both.ps1also checks each service. It stops the module if a service fails to start.
6. Communication encryption (optional)
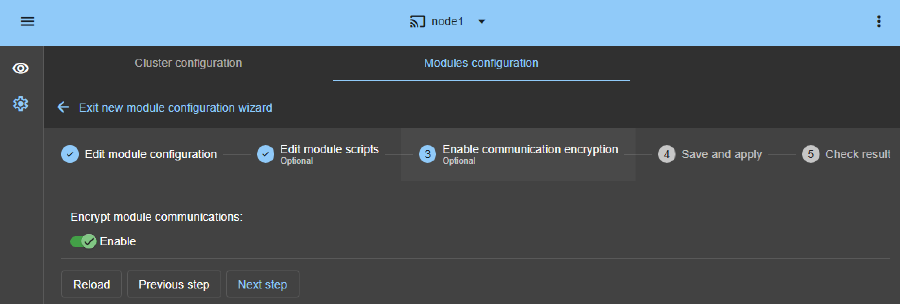
- Keep communication encryption enabled between nodes.
7. Save and apply
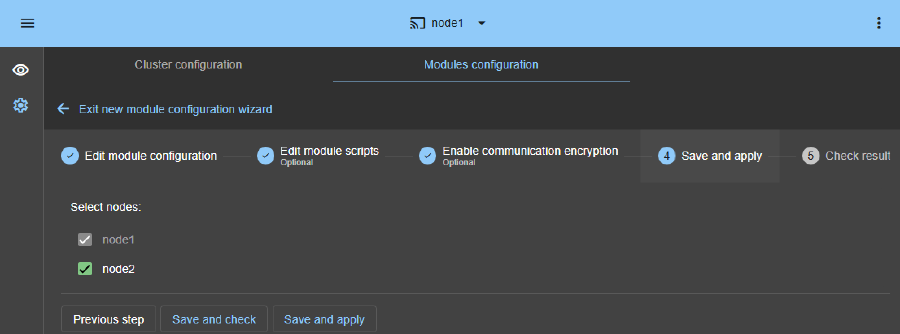
- Click
Save and applyto deploy the configuration and scripts on both nodes.
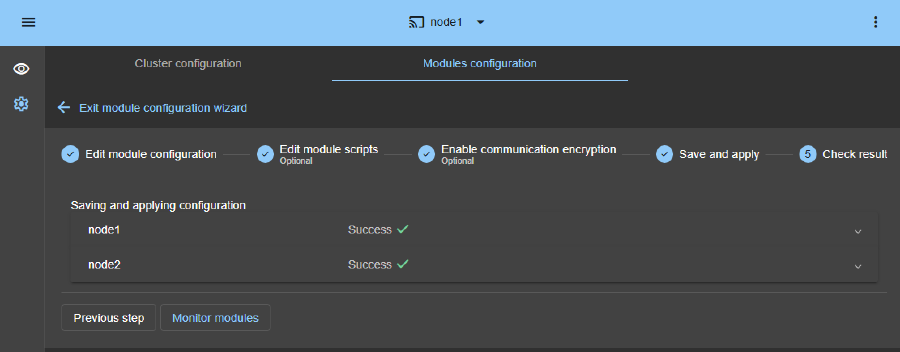
8. Check the configuration result
- Check that both nodes display ✅
Success. Then clickMonitor modules. - If a node displays ❌
Failure, expand its ▼ panel and read the messages. Use the SafeKit AI 🤖 if you need help.
9. Start the farm cluster on node 1 and node 2
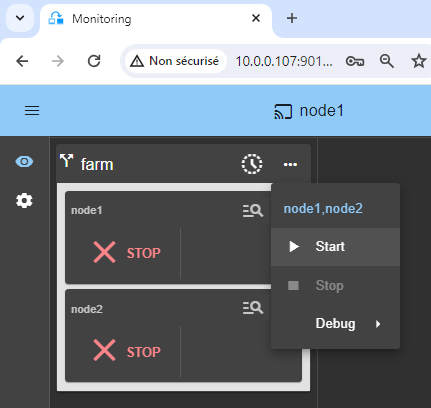
- Open the ⋯ menu and select
Starton both nodes, as shown in the image.
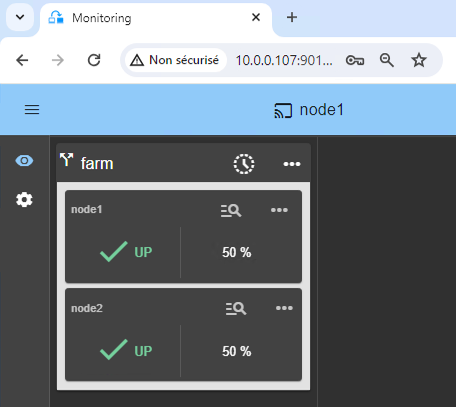
10. Wait until both nodes are UP (green)
Both nodes must reach the state UP (green). This means that the script start_both has run on both nodes.
⚠️ If a node does not reach UP (green), or if the application does not start, check its module log 🖼️.
- Click the 🔍 icon for
node1ornode2to open the module log. Look for errors, such as a check that stopped the module. - In the log, click
start_both. The script output appears on the right. Check for service startup errors. - Use the SafeKit AI 🤖 for help with log messages.
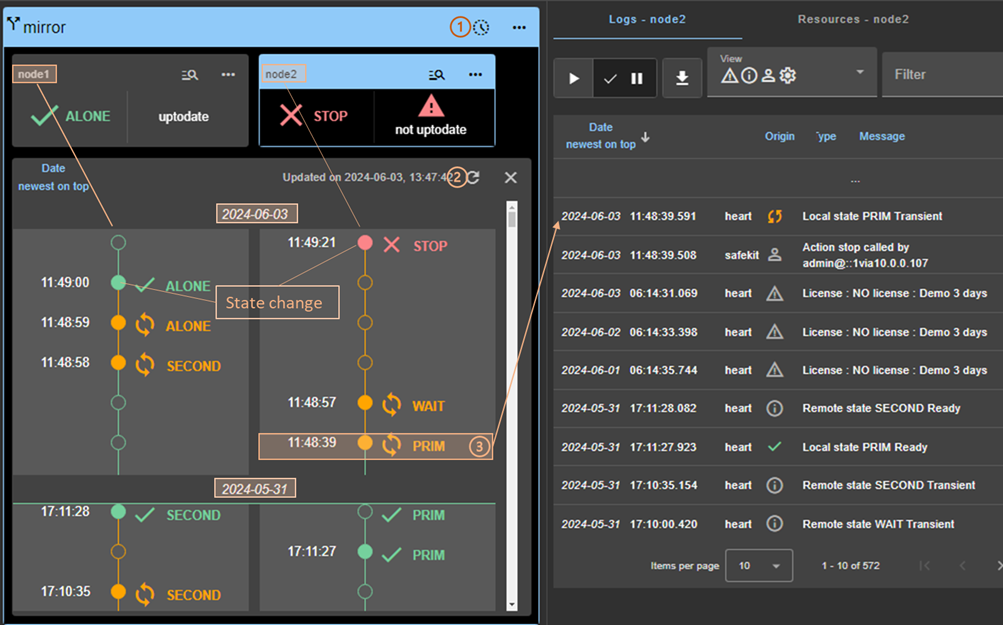
ℹ️ Use the 🕒 timeline 🖼️ to understand the sequence of events in the cluster.
11. Testing
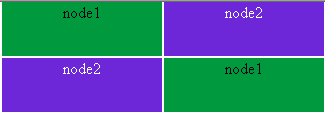
SafeKit includes a built-in mosaic test. See Testing the load balancing virtual IP address in a SafeKit farm cluster.
ℹ️ See the SafeKit Online Training for more details and videos.
12. Support
- For support, create one SafeKit
Snapshotper node. Collect the 2 .zip files.
ℹ️ See SafeKit Support for more information.

Demonstration of the SafeKit farm solution
SafeKit Video: Network Load Balancing and Virtual IP Management (5:03)
In this video, learn how to implement a virtual IP address to provide a single entry point for a 2-node cluster. SafeKit simplifies network load balancing by automatically managing the virtual IP, ensuring that client traffic is distributed across nodes and redirected instantly during a failover. Although this demonstration uses Apache on Windows, the solution works identically with other applications.
Chapters
- 🎬 Architecture: Preparing 2 nodes for a shared Virtual IP (0:13)
- 🎬 Configuration: Setting up the farm.safe module and Virtual IP address (2:20)
- 🎬 Validation: Failover testing and Virtual IP redirection on server crash (2:30)
Step-by-Step Implementation
- 🛠️ Read the guide on setting up a farm.safe cluster on Windows
- 🛠️ Read the guide on setting up a farm.safe cluster on Linux
🔍 Explore SafeKit
Find information about SafeKit features, architectures, videos, documentation, and the free trial.
| Resource | Description | Link |
|---|---|---|
| Key features | Learn why SafeKit is a simple and cost-effective high availability solution. | Discover the key features |
| Use cases | Learn how SafeKit keeps critical applications and infrastructure available. | Explore the use cases |
| Deployment model | SafeKit provides high availability without a SAN or shared storage. | Explore the deployment model |
| High availability strategies | Compare high availability for virtual machines with high availability for applications. | Compare the two strategies |
| Technical specifications | Check the technical requirements and limitations for SafeKit clusters. | Read the technical specifications |
| Videos | Watch demonstrations of SafeKit configuration and automatic failover. | Watch the technical videos |
| Architecture | Learn how the SafeKit Mirror cluster replicates files in real time and handles failover. | Explore the Mirror architecture |
| Architecture | Learn how the SafeKit Farm cluster balances network traffic and handles failover. | Explore the Farm architecture |
| Product comparison | Compare SafeKit with traditional high availability clusters. | Compare the solutions |
| Technical resources | Find technical documentation, download SafeKit, and access the free trial. | Access the documentation and free trial |
| Application modules | Use preconfigured SafeKit modules to set up high availability for your applications. | Explore the application modules |